This tutorial will help you install the Raspberry Pi 4 64-bit Lite operating system. I chose the Lite version over the regular desktop version because it uses less resources than the desktop version. If you are going to use the Pi as a traditional desktop computer, then definitely install the desktop version. But for the purposes of this tutorial, I’m doing the lite installation.
Here is what you will need to get started. Some of these links are affiliate links that support my website and content creation at no additional cost to you.
Raspberry Pi 4 Kit: (Amazon) 2GB | 4GB | 8GB
(The kit comes with the Raspberry Pi 4 board, case, fan, 32GB microSD card, USB microSD card reader, micro HDMI to HDMI cable and power supply.)
The first thing we need to do is download the Raspberry Pi Imager. It is available for Windows, Mac and Ubuntu (Linux).
Once you have it installed, open it up and it will ask you what Raspberry Pi you have, the operating system you want to install and where to install it.
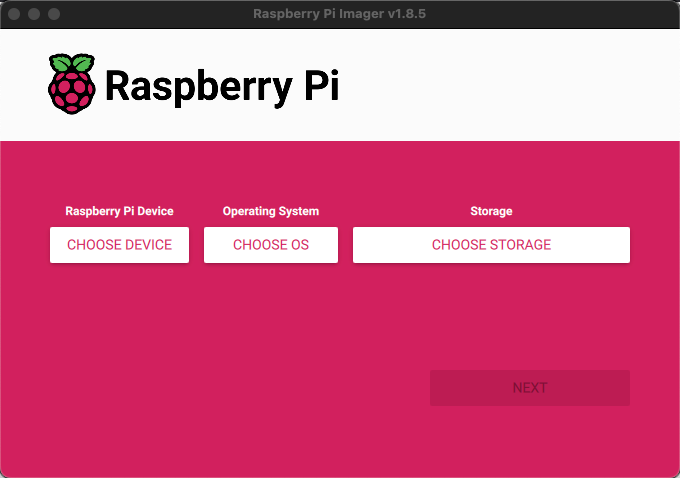
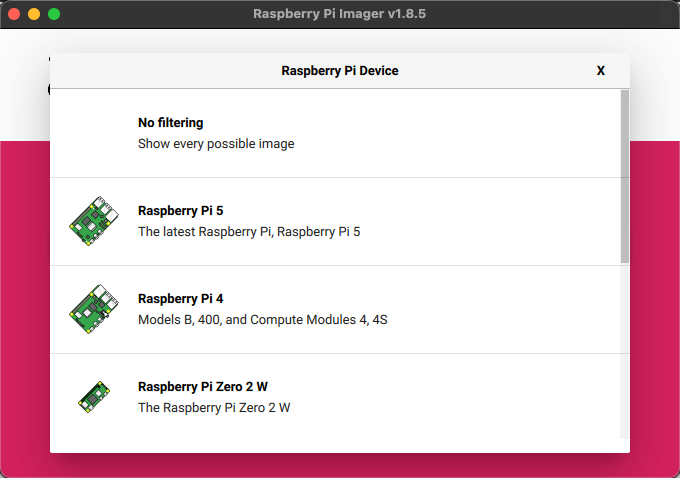
Click on Choose Device and select the Raspberry Pi you have. For me, I am using the Raspberry Pi 4.
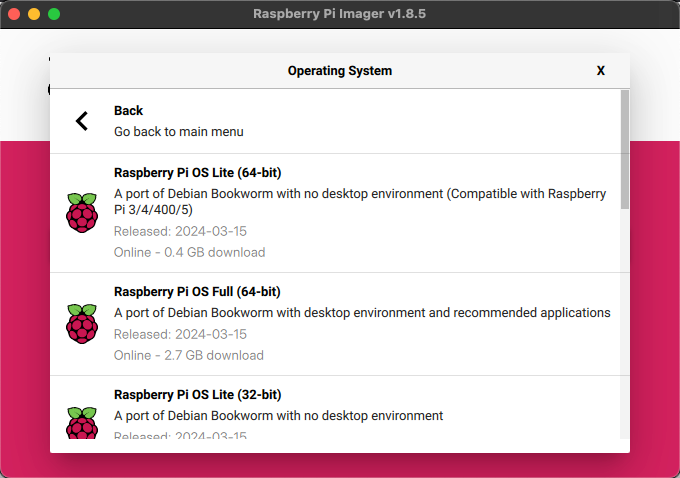
Next click on Choose OS and select Raspberry Pi OS (other) and then choose Raspberry Pi OS Lite (64-bit).
Finally, click on Choose Storage and pick your SD card reader. Make sure you have your microSD card inserted into the card reader before you do this or it won’t show up.
Once you have all three entries populated, click the Next button. It will ask you if you would like to apply OS customization settings.
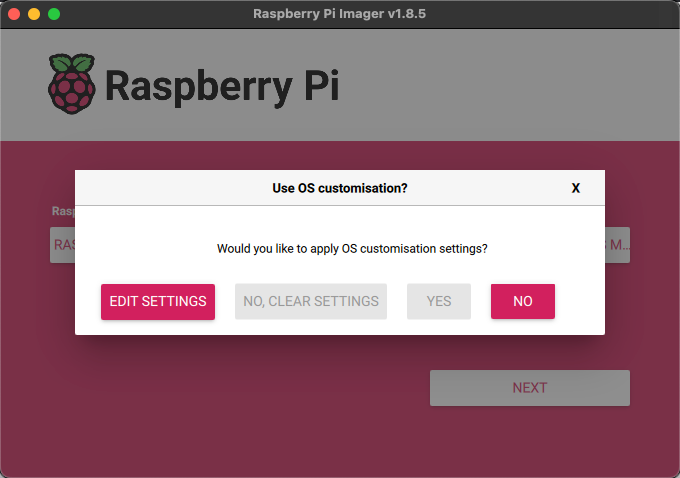
Click Edit Settings.
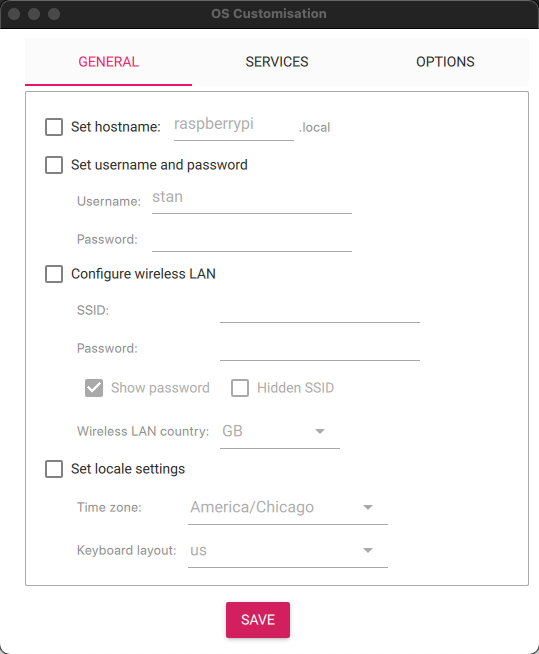
Here you can set the name of your Pi, your username and password, your time zone and configure your WiFi connection.
Hostname
I would set this to something easy to remember because it will help you connect remotely to it later on. It defaults to raspberrypi.
Username and Password
I would recommend using pi for your username unless you have a specific reason to change it. A lot of tutorials including mine assume you are using the default pi username.
Configure wireless LAN
Enter your SSID, password and change the Wireless LAN country to whichever country you are in. It defaults to GB so if you’re are in the US you will need to change it to the US.
Set locale settings
This is for setting up your time zone and keyboard layout. I’m in the central time zone so I am using America/Chicago.
If you’re going to be remoting in via SSH like I do, click the Services section and check the Enable SSH box and Use password authentication.
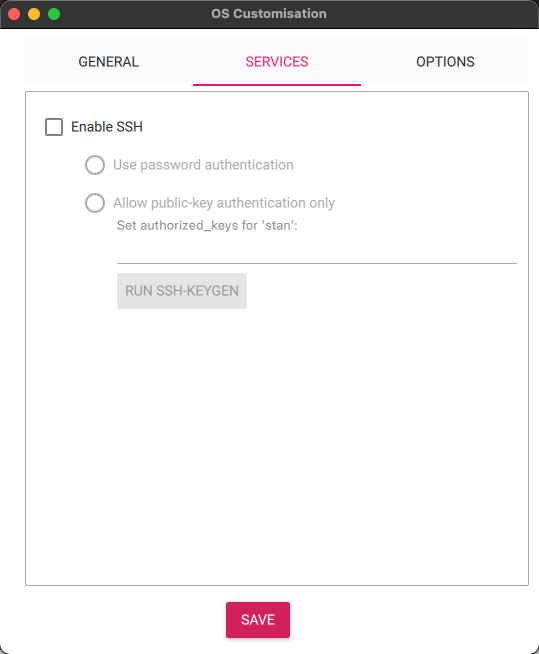
Click the Save button at the bottom which will take you back to the OS customization screen.
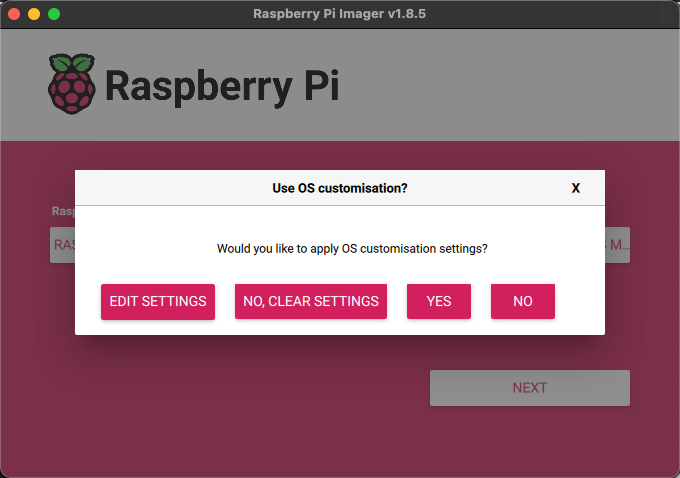
Click on Yes to apply the settings.
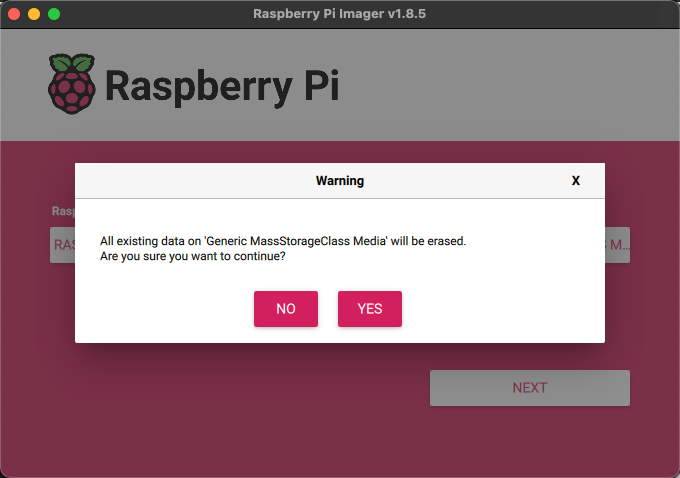
You will get a pop-up warning box that informs you that all data on the microSD card that you chose will be erased. Click Yes to continue.
Now you will see a screen that shows the writing progress to the microSD card. This will take a few minutes and then you should see a screen that looks like the one below.
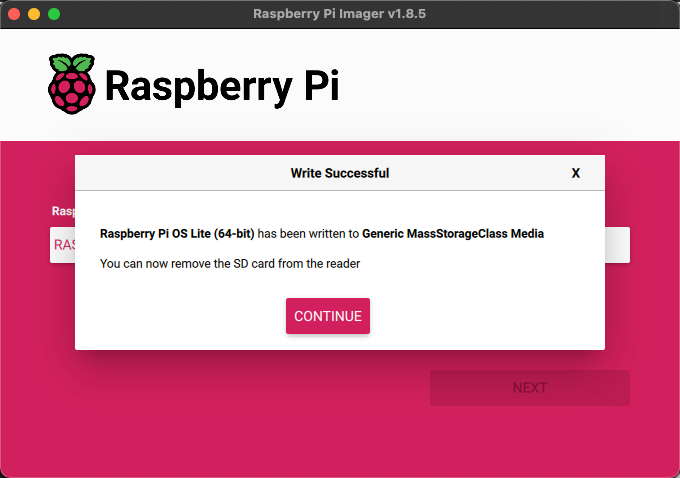
You can now click Continue and remove the microSD card from the card reader. Insert the microSD card into your Raspberry Pi and plug in the power. If you’re not going to remote into it, then plug it into a keyboard and mouse to monitor the boot up process. Otherwise, we will connect to it via SSH. The first time you boot after writing the image, it will take a few minutes to get going.
If you’re on a Mac and want to connect to the Pi via SSH, you can use the built-in Terminal program.
If you’re on Windows, I recommend downloading the free SSH client Putty.
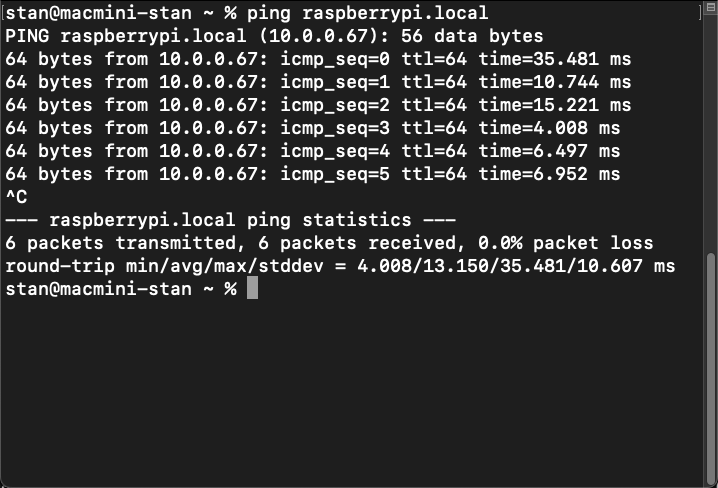
First we will ping the Pi to see if it is on the network. I will use the default raspberrypi.local address for this. If you changed the hostname, then change raspberrypi to whatever hostname you entered. You can run this same command from the terminal on a Mac or the command prompt on Windows.
ping raspberrypi.localIf the Pi is booted up and connected to your WiFi, you should see something similar to what the below image shows. If you see request timed out, then it’s either still booting up or something didn’t connect right. Try working through the steps above and double check the SSID and password to make sure there isn’t a typo somewhere.
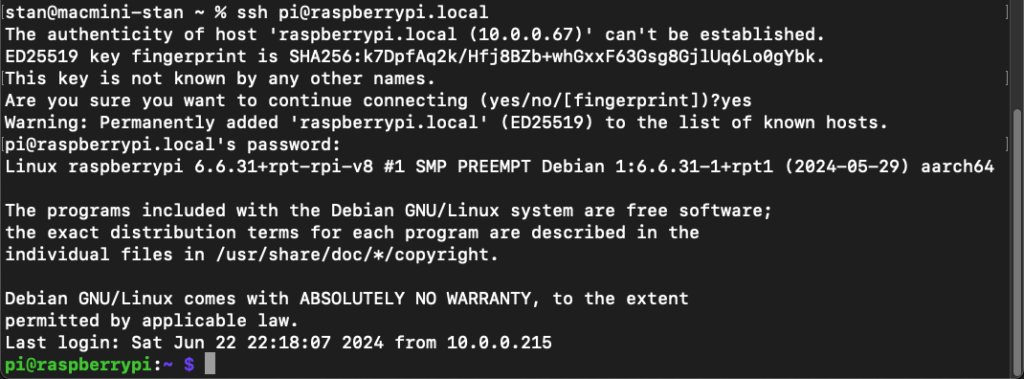
To connect via SSH to your Pi from the Mac Terminal, try the command below.
ssh pi@raspberrypi.localIt should ask you about the authenticity of the host where you can just type in yes and hit enter. Then it will ask you for your password. If you did not set a password in the earlier steps, the default password is raspberry. When you type in the password, you won’t see anything on the screen which is normal. Just hit enter when you are done typing the password and it should log you in.
To connect via SSH to your Pi from a Windows computer, try the following settings using Putty and click Open.
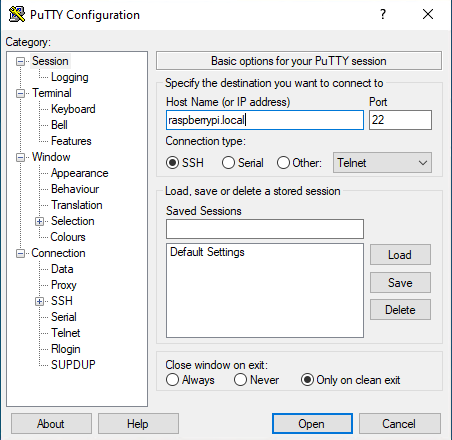
If it comes back saying it can’t find that address, you may have to connect using the IP address instead of the hostname. Check your router to see if it shows you the IP address of your Raspberry Pi. If it does find your Pi, you should see a security alert asking if you want to accept the key.
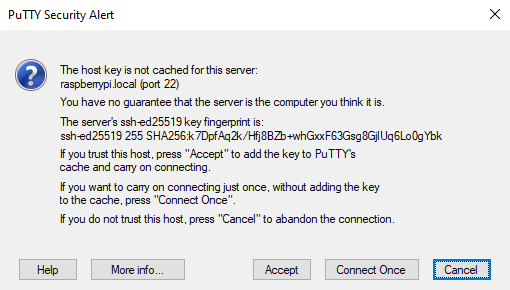
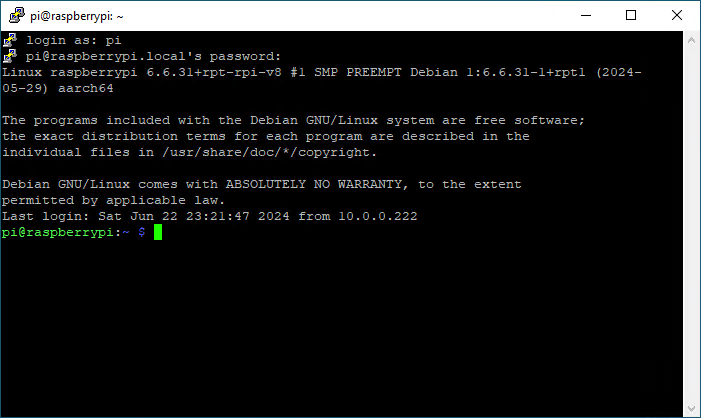
Click Accept and then login with the credentials you configured earlier. If successful, you should see the command prompt as shown below.
Now that you are logged in, I would recommend updating your Pi with the latest software. When you run the sudo command, it will ask you for your password again because it is running that command as the root or admin user.
sudo apt update && sudo apt upgrade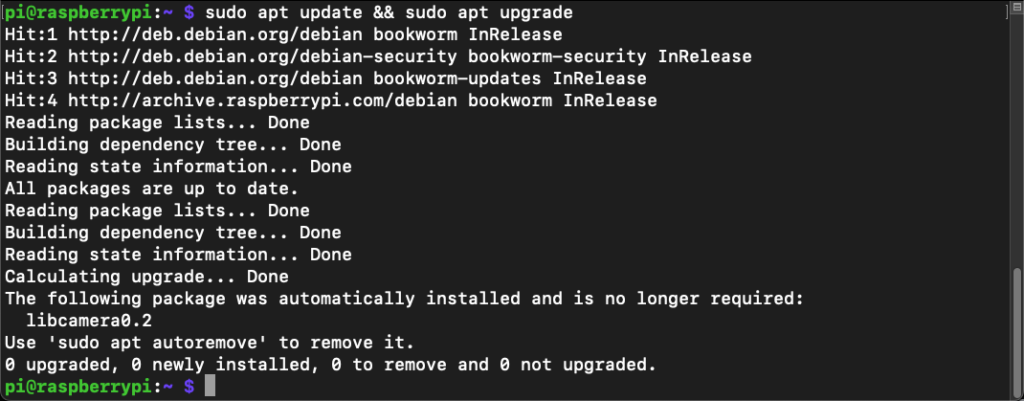
If you have any updates it will ask you to continue so just hit enter which defaults to yes. This will download and install any updates that are out there for your system. I recommend rebooting your Pi when it has finished.
sudo rebootIf you want to turn off your Pi, run the command below. Please do not unplug the power cord or you will probably corrupt your SD card!
sudo shutdownIf you’ve made it this far, then you’ve successfully installed the Raspberry Pi Lite 64-bit operating system! Now what do you do with it? Here are a few of my other Raspberry Pi tutorials that you can check out.
- Listen to radio signals in a browser using a Raspberry Pi and RTL-SDR
- How to track weather balloons with a Raspberry Pi and RTL-SDR
Please let me know if you have any questions about this or other Raspberry Pi related things. Thanks!
Video
I also have a video tutorial available showing how to install the Raspberry Pi OS Lite software.
I really have enjoyed this tutorial, very well written and easy to understand.
Wondering if you have, or have plans, to write about setting up a NAS, or media streamer on the Pi?
Thanks for the nice words. I have a standalone NAS (Synology) so I haven’t really thought about setting one up on a Pi. What sort of media streamer are you thinking of? Would this be to stream stuff to a TV or tablet/phone?